Getting started
Bucketree needs one thing before it can show you anything: an Application Key for your Backblaze B2 account. The first time you open it, a welcome screen says what Bucketree does and walks you through getting one.
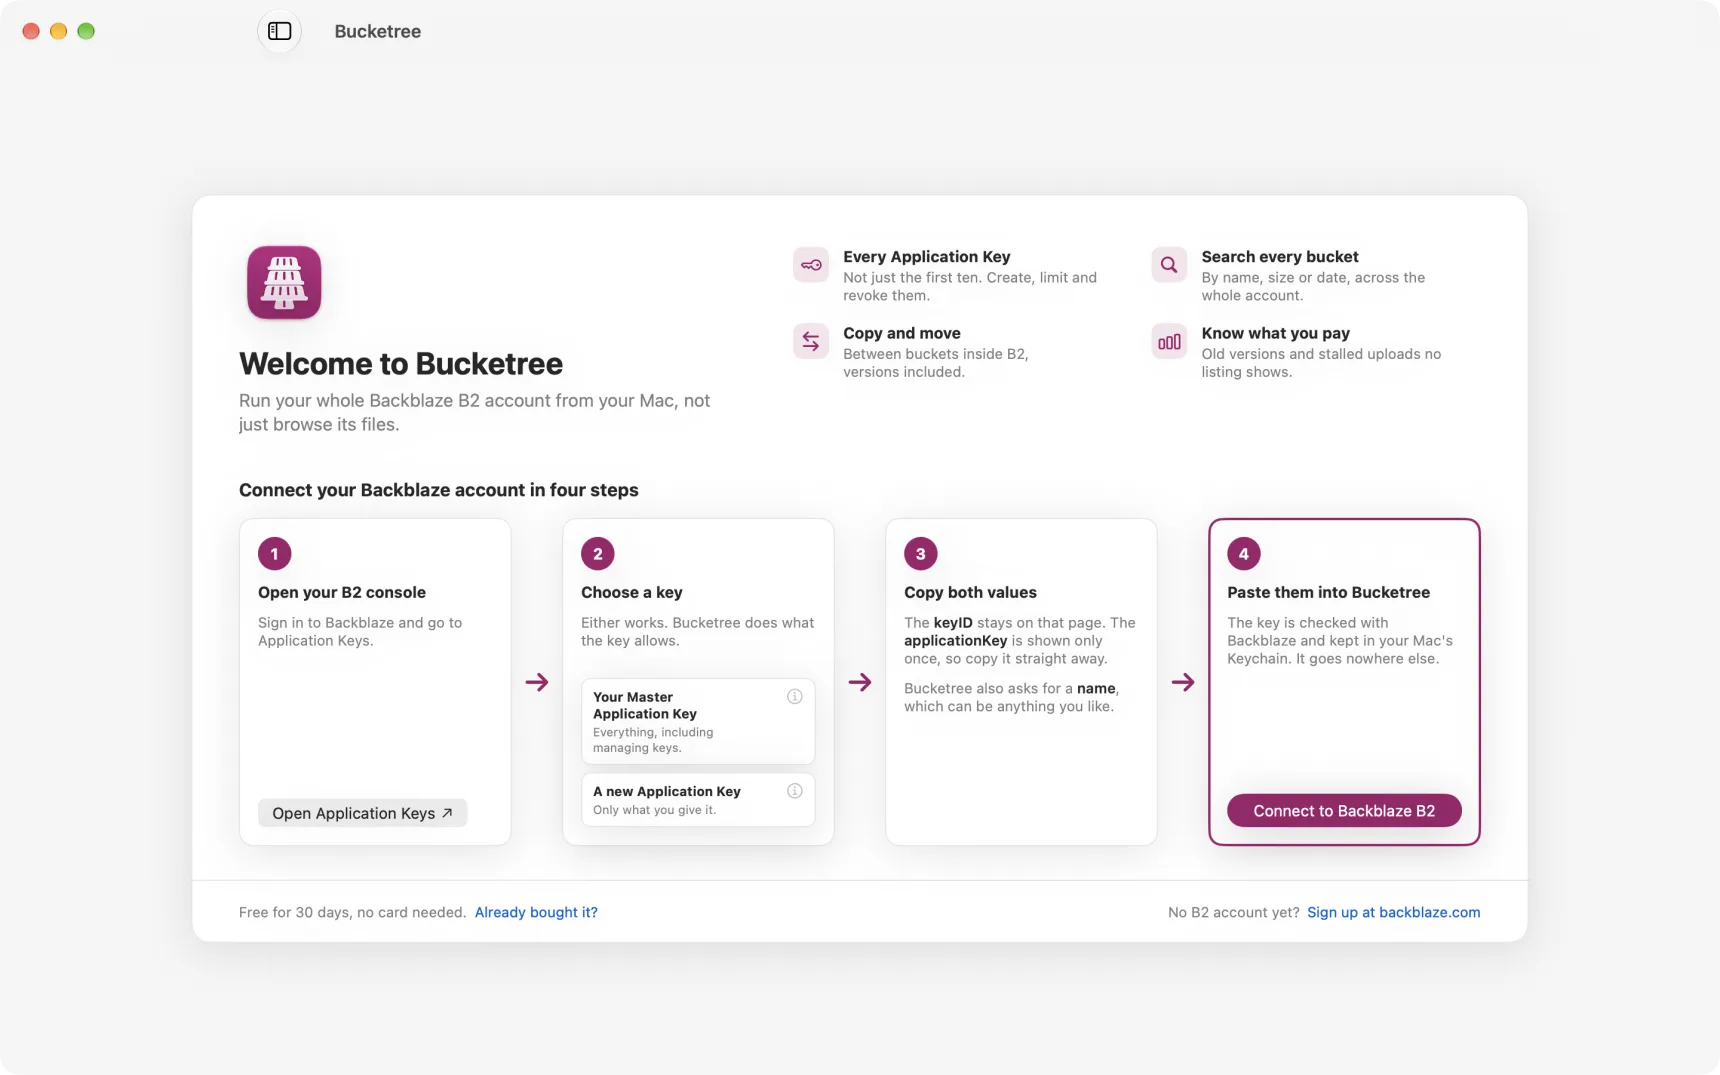
Adding your first key
- Sign in to Backblaze and go to Application Keys. The welcome screen's Open Application Keys button takes you there.
- Click Generate New Master Application Key. If you already have a Master Application Key saved, use that one instead: a new Master Application Key replaces the old one, so anything else using it needs the new one too.
- Copy the keyID and the applicationKey. Backblaze shows the applicationKey only once. Bucketree also asks for a name, which can be anything you like.
- In Bucketree, click Connect to Backblaze B2 and paste them in.
The free trial
The first time your key connects, Bucketree says what you can do for free and what the 30-day trial adds. Browsing every bucket and version, searching the whole account and downloading are free, during the trial and after it. Uploading, copying and moving between buckets, deleting, managing Application Keys and changing bucket settings need the trial or a licence. The trial starts in the app: enter an email address, tick the box if you would like news from us, and click Start Free Trial. No card, and no account to create. Click Not now to carry on browsing, and start it later from Bucketree > Licence… whenever you like. Trying to upload or delete without a trial or licence opens the same sheet.
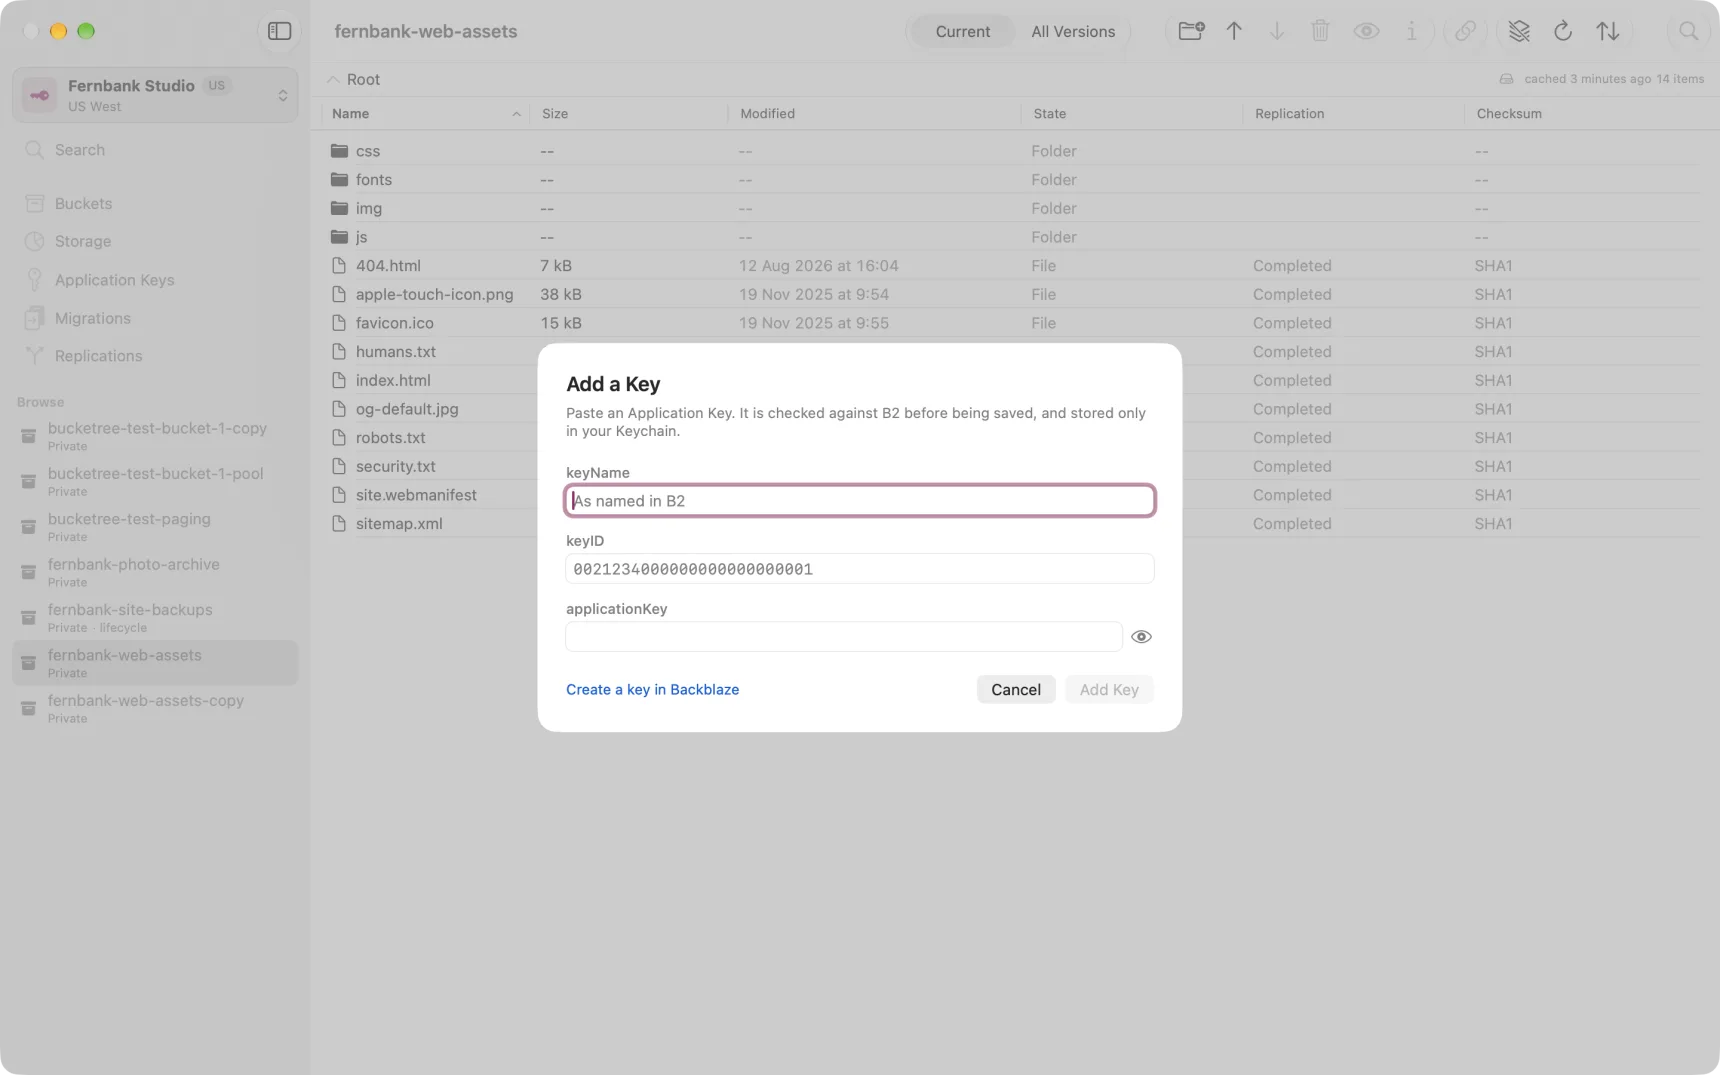
Bucketree uses the names Backblaze shows you: keyID, applicationKey,
keyName. They are not quite consistent with each other, but they are what is
on the screen you just came from.
The key is stored in your Mac's Keychain. Bucketree never writes it to a file, never logs it, and cannot show it back to you afterwards.
Which key should you use?
Either works. Bucketree checks a key with Backblaze before it stores anything, and shows you what that key permits. There are three kinds, and what you can do in Bucketree depends on which you choose.
Your Master Application Key
Every Backblaze account has one. It can do everything, in every bucket, including creating and deleting your other keys. With it, every Bucketree feature is available.
Backblaze shows the Master Application Key only once. If you saved it, use that one. If you generate a new one, the old one stops working straight away, and so does anything else that was using it, such as a backup tool.
An Application Key made in the Backblaze console
In the console, click Add a New Application Key. You choose all buckets or one bucket, Read and Write, Read Only or Write Only, and optionally a file name prefix and an expiry. Bucketree does what the key allows and greys out the rest.
The console's form has no permissions for managing keys. So a key made there cannot list, create or delete keys, and Bucketree's Application Keys pane explains that instead of listing them. To manage keys, connect with your Master Application Key.
You can delete an Application Key at any time, and nothing else that uses your account is affected.
A key made in Bucketree
Once you are connected with your Master Application Key, New Application Key in Bucketree can make keys the console cannot, including one that manages keys. See Application Keys.
A key that can create keys can give a new key any permission at all. So it is as powerful as your Master Application Key, and worth keeping as safe. What it adds is that you can delete it on its own, and give it an expiry.
A good first session
Sign in with the Master Application Key, make the narrower key you actually want, switch to that, and remove the Master Application Key from the app.
The reason to switch is that a scoped key limits what a mistake can reach. That is worth doing on your own Mac and it is not really optional on a shared or unattended one. Nothing here is unique to Bucketree, and none of it stops you carrying on with the Master Application Key if that is what suits you.
What you see first
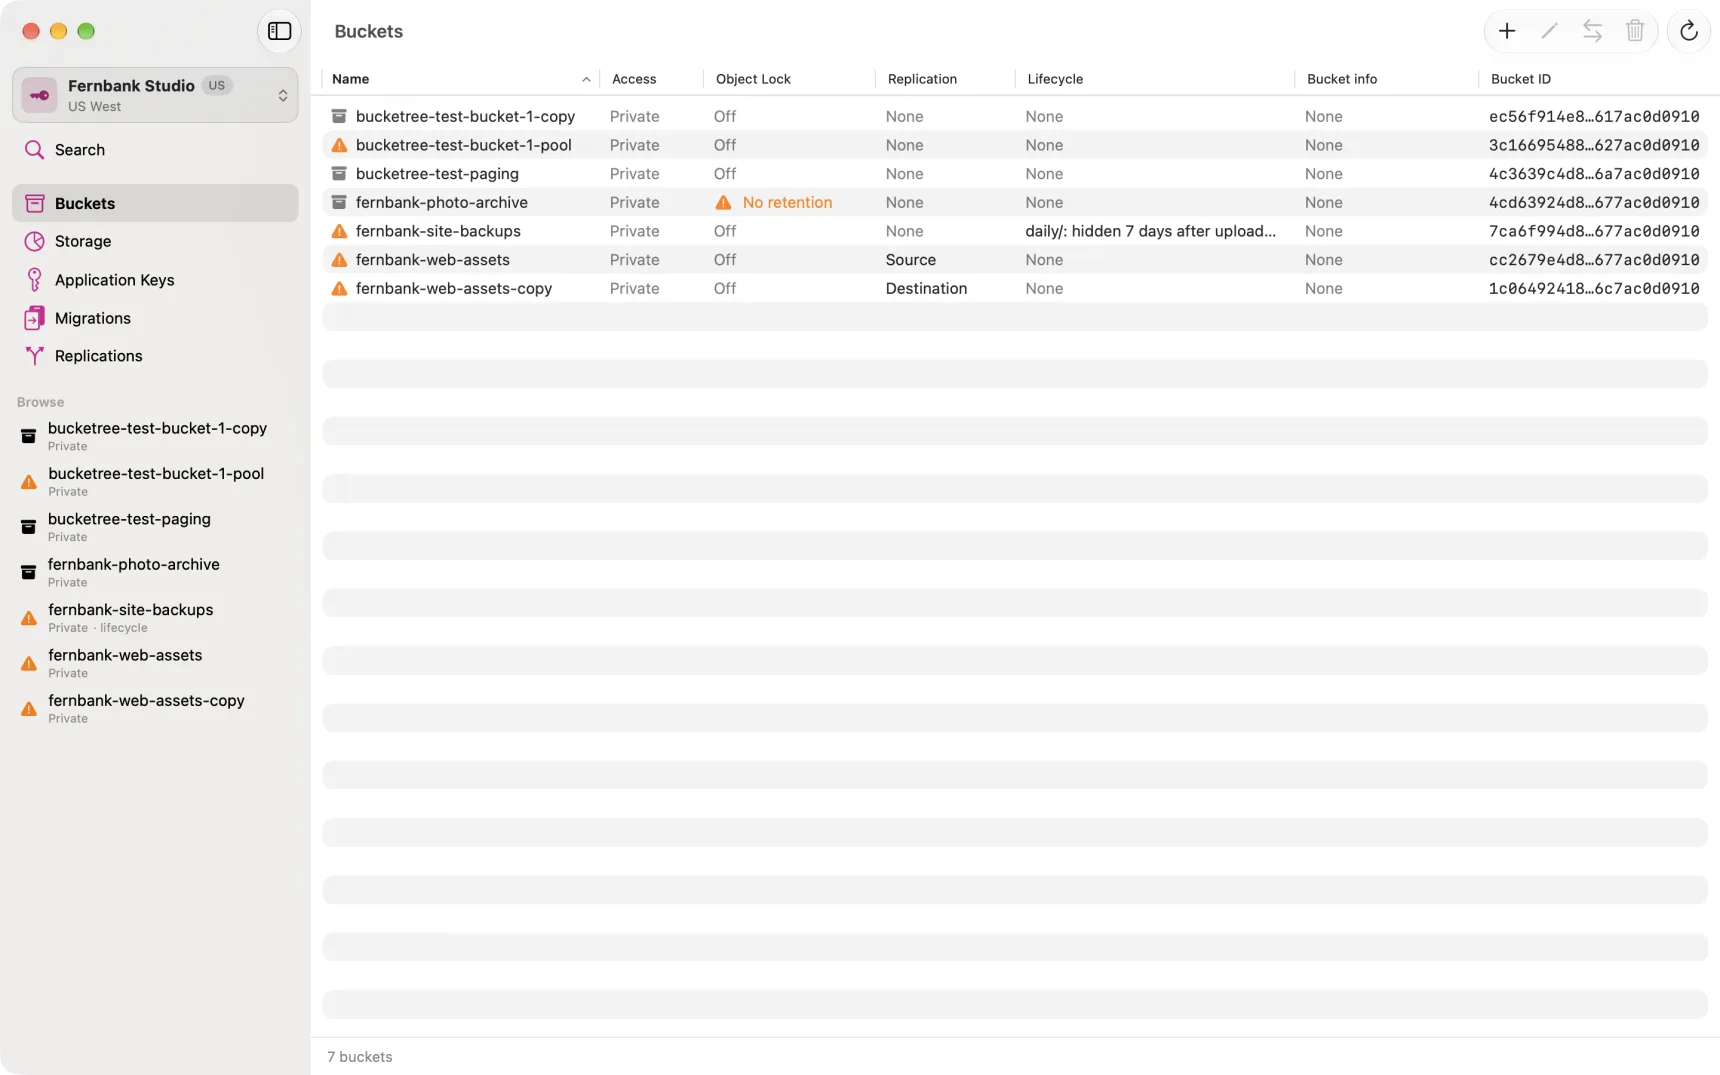
The sidebar lists your buckets, and three account-level views above them:
| View | Shortcut | What it answers |
|---|---|---|
| Buckets | ⌘1 | What buckets do I have, and how are they configured |
| Storage | ⌘2 | What am I storing, and what could I stop paying for |
| Application Keys | ⌘3 | What can reach my account, and with what permissions |
Switching keys
The box at the top of the sidebar names the account and the key in use. Click it to see that key in full: what it permits, which buckets it reaches and when it expires.
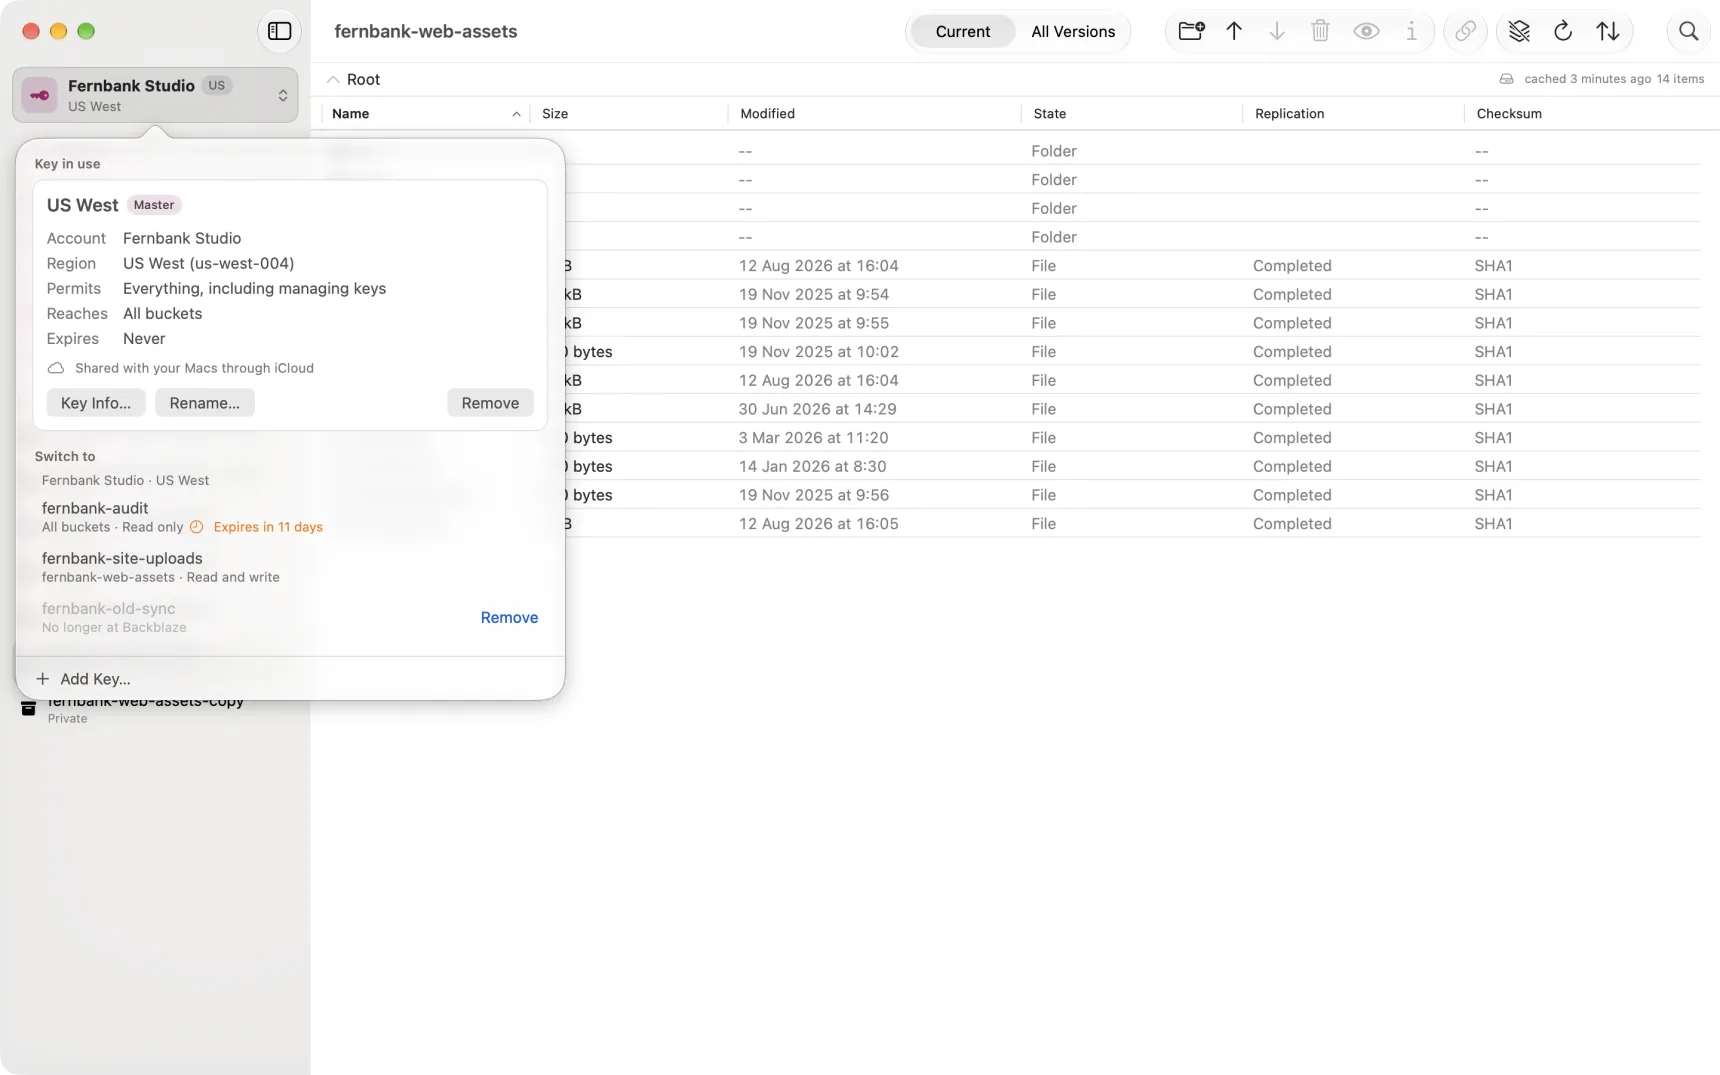
Below that are the other keys Bucketree holds, grouped by account, with each account's Master Application Key first and marked Master. Each one says what it reaches and permits, so you can tell them apart before you switch. Click a key to switch to it. If there are more keys than fit, a count beneath the list says how many are further down; click it to scroll to them. A key that expires within 30 days says so, and a key that has been deleted at Backblaze is marked No longer at Backblaze with a Remove link.
Point at a key to rename it, remove it or open its details without switching to it. Removing a key takes it out of Bucketree and leaves it at Backblaze. Add Key is at the foot of the list.
To rename the account, right-click the box, or choose Account > Rename Account. Backblaze does not name an account, so the name is your own.
Telling us what you think
Choose Help > Send Feedback… to send us a few words about Bucketree. Add your name and a sentence or two, then click Send. We read every one.
We only quote you on bucketree.app if you tick You may quote me on bucketree.app. The email address is optional. We use it only to reply to you.
Two weeks after a licence is activated on your Mac, a single line at the top of the window asks the same question, once. Click No Thanks and it does not come back.